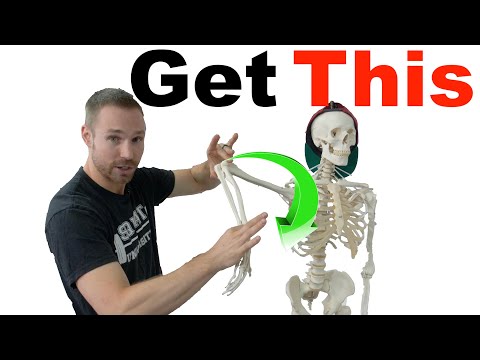
Banded Internal Rotation Overview
The banded internal rotation works your shoulder. Your shoulder is the round muscle on top of your arm. This move trains the small muscles deep inside the shoulder. You need a resistance band tied to a fixed point. You pull the band across your body. The banded internal rotation keeps your shoulders healthy and strong. It trains the muscles that hold your shoulder in place. This helps guard against shoulder pain. Sitting or standing, it keeps your form simple. This move is great for beginners. Use it as a warm-up or at the end of your workout.
What Is The Point of the Banded Internal Rotation?
The banded internal rotation exercise strengthens your rotator cuff muscles and improves shoulder stability. It helps prevent shoulder injuries and fixes muscle imbalances.
How To Do The Banded Internal Rotation
- Attach a resistance band to a fixed point at about elbow height. Stand perpendicular to the anchor so the band pulls out to the side, and grab it with the hand nearest the anchor.
- Tuck that elbow firmly against your side and bend it to 90 degrees. Keeping the elbow pinned to your ribs is essential, since it isolates the internal rotators of the rotator cuff.
- Start with your forearm pointing out away from your body, rotated toward the anchor, so the band is under tension. This is the lengthened, stretched position for the internal rotators.
- Set your posture tall with your chest up, shoulders down, and core lightly braced. Your upper arm stays glued to your side throughout the movement.
- Slowly rotate your forearm inward across your body toward your stomach, keeping your elbow tucked. Drive the motion from your shoulder rotating, not from your wrist or your whole arm.
- Bring your forearm in until your hand is near your midline, feeling the internal rotators work. Keep the movement slow and controlled since these are small stabilizing muscles.
- Pause briefly at the end of the rotation and feel the contraction. Do not let your elbow drift away from your side to gain extra range.
- Slowly return your forearm to the starting position, resisting the band's pull the whole way. The controlled return trains the muscles through the lengthened range too.
- Keep every rep smooth and repeat for 12 to 15 reps for 2 to 3 sets, then turn around to work the other shoulder. This is light shoulder-health work, so keep the tension moderate and the form strict.
Banded Internal Rotation Form Tips
- Keep your elbow tucked against your side.
- Move only your forearm, not your whole arm.
- Pull the band across your belly.
- Keep your wrist straight and firm.
- Move slow and controlled both ways.
- Keep the band tight the whole set.
- Stand tall with your core tight.
- Breathe out as you pull in.
- Return to the start slow. Do not let it snap back.
Common Mistakes to Avoid for the Banded Internal Rotation
- Letting your elbow drift away from your side. When your elbow leaves your ribs, bigger muscles take over and the rotator cuff stops being isolated. Pin your elbow firmly to your side, and tucking a rolled towel there can help you keep it in place.
- Using a band that is too heavy. Excess tension forces you to recruit your chest and shoulder to muscle the rotation, defeating the purpose. Use light resistance so the small internal rotators do the work through a full range.
- Rotating from your wrist instead of your shoulder. Bending at the wrist to move the band skips the shoulder rotation entirely. Keep your wrist firm and neutral and drive the motion from your shoulder turning in.
- Rushing the reps. Speeding through lets momentum swing the band and skips the controlled work the cuff needs. Move slowly and deliberately on both the rotation and the return.
- Twisting your whole torso to help. Rotating your body to pull the band cheats the shoulder out of its work. Keep your torso square and still so the motion comes only from your shoulder.
- Cutting the range short. Only rotating partway trains a thin slice of the movement. Rotate fully across toward your midline, then return all the way out to the stretched start.
- Skipping the controlled return. Letting the band snap your arm back out wastes the lengthened portion of the exercise. Resist the band on the way back and stay in control.
- Standing at the wrong distance from the anchor. Too close gives no tension and too far overloads the start. Position yourself so the band is taut at the start and challenging but manageable through the range.
- Shrugging your shoulder up during the rep. Letting the shoulder ride toward your ear crowds the joint and shifts the work. Keep your shoulder down and set so the rotators work cleanly.
- Ignoring your weaker side. Rotator cuff imbalances are common and can cause nagging shoulder issues. Give both shoulders equal, careful attention and match your reps.
- Expecting it to build size. Treating this cuff drill like a mass builder leads to loading it wrongly. Use it for shoulder health, stability, and balance rather than for size.
- Pushing through sharp shoulder pain. Grinding through a pinch or ache can worsen a cuff problem. Keep the load light, stay in a pain-free range, and see a professional if pain persists.
Banded Internal Rotation Workout Tips
- Keep your elbow pinned to your side the whole time. That tucked elbow isolates the internal rotators, and tucking a rolled towel between your elbow and ribs is a great way to enforce it.
- Use light resistance. This is a small stabilizing muscle drill, so heavy tension only brings in your chest and shoulder and defeats the purpose.
- Rotate from your shoulder, not your wrist. Keeping your wrist firm and turning from the shoulder is what actually trains the rotator cuff.
- Move slowly and deliberately. The cuff responds to control, so a slow tempo on both the rotation and the return is far better than speed.
- Control the return against the band. Resisting the band back out trains the muscles through their lengthened range, not just the contraction.
- Use this to balance your shoulder for injury prevention. The internal rotators support the joint under pressing, and training them alongside external rotation keeps your shoulders healthy.
- Program it as prehab or a warm-up on push and shoulder days. A few light sets prime the cuff before heavy pressing or round out a shoulder session.
- Aim for 12 to 15 reps for 2 to 3 sets. Higher reps with light tension build the endurance and control the stabilizers need.
- Give both shoulders equal attention. Cuff imbalances are a common source of shoulder pain, so match your reps and effort side to side.
- Keep your torso square and still. Isolating the shoulder rotation, rather than twisting your body, is what makes the light band effective.
- Balance this with external rotation work. Training both the internal and external rotators keeps the shoulder stable and reduces your injury risk.
- Keep your shoulder down and set throughout. A packed shoulder gives the rotators room to work and protects the joint.
- Progress the tension in small steps once your form is perfect. The cuff is easy to overload, so patience here pays off in healthier shoulders.
- Stay in a pain-free range. If a certain point pinches, shorten your range rather than forcing through it.
- Warm up gently before heavier pressing. A few sets of light rotation prepare the shoulder for the bigger lifts to come.
- Be consistent, since cuff strength is maintenance. A little regular work keeps your shoulders resilient far better than an occasional hard session.








Questions & Comments
Be the first to ask a question about this exercise.